Friday, March 16, 2012

Inline Skates and skateboards


When I was a child, I was only aware of a few different skate types: quad skates that were over-the-shoe or that looked like boots with wheels. Now, there are many different types of skates. Each design has a different purpose. Some are best used on paved surfaces, others for indoors, some for speed skating or hockey, and I was amazed to find off-road skates.There are also different skateboard types. I will show you what my sons and I researched while trying to find out which kind we like best.


Quad skates: The designs shown are for outdoor skating. The skates have a wider 5 inch“truck” that offers stability. If they have a 3 inch truck, they would be great for speed. Some skates like this have a front and a back break.


Scorpion skates are great for going over cracks and bumps in the road. The skates pictures are for multi-terrain skating: pavement, cobble, grass and dirt tracks.


Inline Hockey Skates are designed to be used indoors, outdoors, or both. There are skates made multiple skill levels. The beginner skates are more forgiving and allow skaters to develop their skills while the advanced skates offer increased speed and maneuverability. One pair I researched even had memory foam for added comfort.


Inline Speed Skates come with 3 or 4 wheels. The shoes are close-fitting and have little padding. Most call this sport Inline Racing. Many people who are inline racing switch back and forth between this and ice speed skating. My guess is that the shoes and frames for ice speed skating and inline racing are built similarly, making it an easy transition

 Skate Boards come in lots of shapes and sizes, too. This skate board allows the user to similate regular skateboarding, snowboarding and surfing.

Sole Skates
Are like riding a mini skateboard. I had to watch a video to figure out how this works because it looks so small. There are more videos on skateboards. 
 
My 7 year old son really loves to skate. He is hopes that I will get him some inline speed skates. My 11 year old said that he would like to learn how to play roller hockey. My 9 year old just wants to skate and will be happy to have a good pair of inline skates. I would like to try out the multi terrain skates. They look like a lot of fun!


Pin It

Thursday, March 15, 2012

Granola Bars


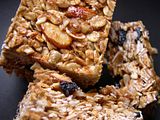
My family enjoys granola bars. I really want my family to have healthy granola bars. I know it sounds kind of crazy that homemade granola bars could be healthy since the recipes are often found in the cookie section of a cookbook. However, when a granola bar recipe is made from scratch at home, I have more control over the quality of the ingredients as well as gaining the ability to change the recipe to my family's tastes.

Homemade Granola Bars
3 cups granola
3 cups quick-cooking rolled oats
3 cups chopped nuts, sunflower seeds, sesame seeds, or shredded coconut
1 ½ cups flour
1 ½ cups raisins, craisins, other dried fruit, or semi-sweet chocolate chips*
3 beaten eggs
1 cup honey, maple syrup, or other syrup/liquid sweetener
1 cup cooking oil
¾ cups packed brown sugar
½ teaspoon ground cinnamon


Place greased aluminum foil on a bar pan that measures about 15 1/2" x 10”. Mix the first 5 ingredients in a large mixing bowl. Add eggs, honey or syrup, oil, brown sugar, and cinnamon. Press onto aluminum foil lined pan.

Bake in a 325 degree oven for 30-35 minutes or edges are browned. Cool, then use foil to lift granola bars from pan. Cut into bars and enjoy. Store left overs in an air tight container. Makes about 75 bars.

* Since I love chocolate, we usually use a combination of chocolate chips, raisins, and/or craisins to equal 1 ½ cups.


More of my recipes:
Pin It

The Quartering Act of 1774

I enjoy teaching my children about various topics. My kids have covered the Revolutionary War and the events that preceded it. One of my kids asked me about the quartering acts and wondered if they were about quarters- as in the coin worth 25 cents. So, this is one quartering act definition that might make sense to a student grade 4 or above.

Have you ever had military personnel stay on your property? How would you feel if you were told you were required to do so? Most people would find it intrusive. I know I would. In 1774, the second quartering act was passed, requiring colonists to house British troops. Loyalists, people who were loyal to the king, would have had fewer problems with the idea. The rest of the colonists seethed at the thought. "Why should I provide room and board for someone who is here to make sure I do not have my freedom?" may have been what many thought when this act was forced upon them. This would have rung true especially in places with limited resources.

I used to think that these soldiers were staying within private homes. Upon further research, I learned that the soldiers actually stayed in barns, warehouses, empty homes and buildings. However, if act passed today forcing our military men and women, I don't have a barn or any other type of habitable outbuilding. Even if I had such a building, or soldiers stayed in my neighbors' detached garages, I would be anything but happy. I would expect the headlines of newspapers to say something about big brother is watching.

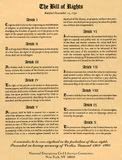
Fortunately, we don't have to provide room and board for our military, unless we are in the middle of a war. It's outlined in the Bill of Rights that only during war can soldiers be quartered in "any house," and only "in a manner to be prescribed by law."


More early American history resources are available here.

Pin It

How to Make Root Beer with Dry Ice


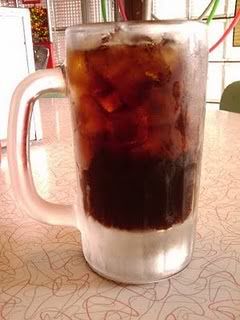
When I was little, my parents used to have parties where they made root beer using the dry ice method. I found this fascinating. Now, I have kids of my own. I'm sure they would love to do this. I decided it was high time that I researched how to use the dry ice method because the other method, using yeast creates a small amount of alcohol and the bottom of the bottle tastes terrible. Also, the dry ice method makes a lot in a short amount of time. I have a large crew, so making multiple gallons in one batch meets my needs. The recipe I'll show you is found on many sites on the internet. The problem is finding some of the supplies and ingredients. I have no idea where to get them. So, I'm going to research them and share what I find so you don't have to do all the work, too.

Supplies:
  • Large insulated drink cooler
  • 6 cups white sugar
  • 3 1/3 gallons cold water
  • 2 oz root beer extract
  • 4 lbs dry ice
  • Heavy plastic gloves for handling the dry ice
  • Large metal spoon, or other stirring utensil

Procedure:
  • Mix together the sugar and water, pouring both into the insulated cooler. Stir until the mixture dissolves completely.
  • Blend in the root beer extract, stirring well.
  • Cover loosely, but do not seal. Air pressure can build up inside the cooler, causing it to explode.
  • Allow mixture to stand at room temperature for about an hour, before serving.
  • Store leftover root beer in gallon jugs, in a cool, dry place.

Now we need to focus on where to find the ingredients we don't normally keep in our pantry.
Insulated coolers and Root beer flavoring.
Amazon.com has 2,3, 5 and 10 gallon insulated beverage coolers. They also have root beer flavoring, concentrate, and extract. It may be safe to guess that the coolers may be at a sporting goods store in the summer. However, that item did not show up at those stores during my internet search. I earn $25 in Amazon Gift cards at SwagBucks, so that I was motivated to look there when it showed up in my internet search.

Gloves for handling Dry Ice:
One website said that oven mitts will work for handling dry ice. Yea! One less thing to buy!

Dry Ice:
Lastly, we want to buy dry ice from somewhere close enough that it is the same size as we originally asked for by the time it reaches our home. I found DryIceIdeas.com. You simply enter in your zip code, select a mile radius you're willing to travel to get the dry ice and it supplies you a list of local stores that carry dry ice. I found 12 within 25 miles. The closest is only 11 miles away- I live in a rural area, so that is pretty close.

The rest of the ingredients are probably in your pantry. Let's gather the materials and have a good time making home made root beer!

Smoothie recipes available here

More recipes are available here

Pin It

Wednesday, March 14, 2012

How to become a published author

So you want to become a published author? Guess what? So do I! What is the process? How do we get started? I decided to do some research about the process and came up with a few ways to get started.

 eHow says that the first step is to choose a genre. Have you chosen one? I haven't. There are too many choices and my head reels as I think about all the genres and subgenres. Perhaps, they think I'm ready to write a book.

Then, I found an online magazine that features an author who is a writing coach. She suggests that aspiring authors just start writing. Have you started writing yet? I have. I just started this blog all about writing and I have 2 other blogs that I write in regularly. The key to writing is to find something that you know about. When we start writing, we learn how to jump over our first major hurdle: Fear... Yep, Fear. Fear that our writing won't be good enough. Fear that no one will like what we wrote. Fear that we'll get started on a piece, but suddenly... nothing. Fear that after all those hours of labor, no publisher will be interested.

 eHow's suggested 3rd step is to make a plan. I like the bubble diagram method. It looks like my graphic, which is set up to have 1 topic written with 3 paragraphs that contain 2 details each. However, the subtopic bubbles could transformed to list character's name and the detail bubbles the character's personality traits. At this stage, I'm going to stick to writing short stories and articles. I'm doing that right now, so I must be on the right track!

I really like eHow's suggested 4th step: set aside some scheduled time each day to write. Make a goal. They suggest setting a goal for writing a certain number of pages. I'm at the stage where it might be better to write for a certain amount of minutes because I have 6 kids and the only time I can focus on writing is when they're sleeping. What kind of schedule will you set up?

Next run it by some friends and edit. What do they think? Since I'm writing in a blog, all my successes and failures will be public. Feel free to add your comments.

After editing is done, find an editor. If you don't know one, ask friends. I have 2 friends who are published authors, Maureen Mullis and JoAnn Chaney, who could lead me in the right direction. There is also "The Writer's Market."

Then, more writing! Write letters to explain why they should represent your work. Highlight the main points of what you wrote and what sets it apart from the rest.

Once you have an agent, let them do their work. Do keep in touch so you understand the process of getting your book published and where your book is in the process. eHow said that first works by emerging authors can take many months or a year to get published.

The last few steps to become a published author seem far into the future for me. When I am ready to publish, I may choose to write for an audience who only uses an ereader, such as the Nook or Kindle. I've heard that publishing books designed for the ereader is another process altoghether. In the mean time, I'm going to keep blogging.

Pin It